Friday, August 30, 2019

Well Howdy There!

Hi there Aly here, hope you are all having a great week. This week I am sharing a gorgeous card for any occasion, I totally love quotes and love using them in my work, you will find this as always at Bev's fab Etsy Store.
This card I have made using the fab Southwestern Garden Set

See you next time Hugs Aly xx


Thursday, August 29, 2019

Sketched Spring Blossoms - Memory Page with Kimberly Wiener

Hello there!  Kimberly Wiener here sharing another creation using  Beverly Cole's lovely images available on Etsy at TheArtsystamperShop.


Today I am featuring the Sketched Spring Blossoms Stamp Set..  
This set features several variations of 
colored and non colored 
spring blossoms, singles as 
well as grouped, and sentiments. 


I selected the single un-colored blossom and printed it approx. 3.5x3.5 inches
 to take center stage of my creation.  My creation is on a 5x5 paper size.
I added some embossed sentiments in separate strips for a strong emphasis of focus on the blossom. My final step was adding my photo that was layered a few times 
with coordinating colored card stock.


I hope that you have time to create and enjoy these 
wonderful images by Beverly Cole!


To see more about this project as well as details on the supplies used, 
please be sure to visit my blog

Please visit the Facebook Page: Artsystamper Digitals
Also visit Artsystamper on Instagram is a great place to see many inspiring projects! 

Beverly Cole has videos on YouTube  - BZCole Mixed Media with tutorials for her
 digital images as well as tips, tricks, and projects in process!

Wednesday, August 28, 2019

Cruisin'


Hello lovelies, hope you are well! Today I am sharing my DT creation for Artsystampers I have created a tag using the fabulous Cruisin' digital stamp set 


I decided to use the yellow retro car from the stamp set as I thought it complimented this wonderful collage paper from Manudesign Studio


Next, I used a scratch design mixed media stamp, which I stamped on to the paper using Black soot distress ink. 


Using the same ink, I used a Tim Holtz star and Route 66 stamp to complete my background.


Finally, I used a Tim Holtz tire mark stamp and adhered the car stamp at an angle on the edge of my tag and trimmed the excess. 
I have also used the "you're cool Daddy-O" quote from the Cruisin' digital stamp set. Thank you so much for stopping by, see you on the next post! Hugs, Zowie xx 

Artystampers Digitals Blog

The Artsystamper Shop {Etsy}

BZ Cole mixed media {YouTube}

Artsystamper {Facebook}

Tuesday, August 27, 2019

Mermaid Wishes Series Part 3 - by Jess

Hello friends!


It's fresh. by jess back again today! I know you are excited for Part 3 in my Mermaid Series for the Artystamper design team.  Have you picked up your  Mermaid Wishes Digital Stamp set yet?

Here is handmade card #3:


I just adore pre-colored digital images. I'm not the best coloring artist, so when I can just print and go, I am in love!!!  You can see the tail peek out from under the die cut circle - it actually pops up when laying flat!  How about that cute little anchor paper clip? Too cute!  And of course...I can't forget the Nuvo drops to decorate.  

I hope you will check out the shop to grab this beautiful set. I look forward to sharing the Grand Finale Part 4 in two weeks!

Want more? Check out all the Artsystamper Media Channels:
Facebook: Artsystamper Digitals
YouTube: BZ Cole Mixed Media
Etsy Shop: TheArtsystamperShop

See you soon!

Jess

Monday, August 26, 2019

Garden Asters with Carole

Hello! 
Happy Monday!

Today I have two cards to share and both feature the beautiful Aster Garden digital stamp set.

My first card has a mixed media background and is hand coloured. Here it is:


Aren't these asters gorgeous!  I printed out several and coloured them with Copic markers, adding some white Posca paint dots to the centres. I fussy cut the flowers and put them to one side whilst I made the background.
The background is 12.5 x 12.5 cm 300 gsm card. I used a brayer to apply Distress Oxide inks in Twisted Citron and Wilted Violet, concentrating the violet around the edges. I used a stencil to add some white circles and dots with watered down acrylic paint and a stamp to add touches of Black Soot grungy marks. Next I added white paint splatters using a Posca pen. I blended Wilted Violet ink around the background's edges, then used archival ink in black to add a little more definition.


 I decided to add some ribbon along the bottom edge and found this purple organza ribbon and green satin ribbon in my stash. I knotted a piece of the purple ribbon as attached to the band.
The sentiment is one of four that comes in the digital stamp set and I opted to die cut it with a stitched rectangle die. I inked lightly around the edges in archival black ink and popped the sentiment on foam for dimension.
I arranged two of the flowers, shaping them with a stylus and adding foam to the centres. The stems were glued directly onto the background


To finish, I matted the background onto violet card and then green card and placed all onto a 14.5 cm square card base.

***
My second card uses the pre-coloured yellow aster from the Aster Garden set along with the yellow taxi paper from Bev's Retro Fun Papers


I printed the paper to fit an A6 card and printed the yellow aster three times. I die cut one of the aster's using a torn rectangle die. Leaving the die in place, I inked the background lightly using Scattered Staw Distress Ink, concentrating the colour around the edges of the die cut. By leaving the die in place you get a crisp white border to the image mat. I also die cut a piece of black card upon which to mat the image.
As you may know, I'm not keen on one dimensional cards when I use pre-coloured images. I always have to make my own mark on them, so this time I opted to cut petals from the other two asters and layer them up. I inked the edges of the fussy cut petals with Scattered Straw and layered them with foam pads.


 Before I assembled the card, I inked the edges of the yellow paper with Scattered Straw, then it was just a case of matting the paper on black card, adding the matted image on foam tape and adhering the sentiment band which I also inked.
I decided to add a few Posca paint dots to the image background.

Here are the TheArtsystamperShop products I used:


Aster Garden           Retro Fun Papers


***
That's all for today! 

Please check out:

Thank you for stopping by today!


Friday, August 23, 2019

Enjoy the Little Things

Hi Everyone! 
This is Michelle back with you today. I wanted to show you my latest card featuring a digital download from The ArtsyStamper Shop


I love, love this flower image! The flower is from the digital download, Aster Garden.


This set comes with images that colored for you or uncolored so you can add your own creative flair.

To make this card I printed the Aster flower to the size I wanted and printed it out. I colored it with alcohol ink markers and fussy cut. I then found paper in my stash for the background panel. I added a piece of corrugated cardboard, sequins, ribbon and twine. The sentiment is from the Beverly's Rose Stamp set. I used an oval die cut from my stash for the sentiment and added it to my card with foam squares for a little dimension.

Make sure you check out  The ArtsyStamper Shop on Etsy  and  Beverly's YouTube Channel. Don't forget to check out the ArtsyStamper Facebook page! She always has lots of inspiration, tips and tricks for you!

Thursday, August 22, 2019

Box Card Using Koi Pond Digital Stamp Set

Hello, everyone! It's Nancy here with you today.

I'm sharing a fun project that features:


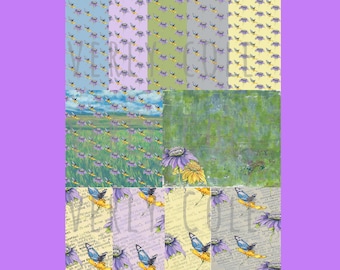
Marble Magic Digital Paper Pack, and


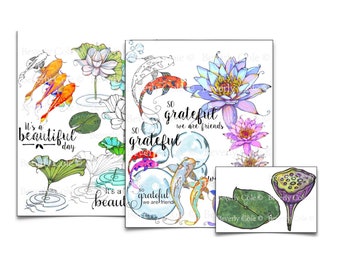
Koi Pond Digital Stamp Set.


I used one paper from the Marble Magic Collection,

and multiple pre-colored images from the Koi Pond Stamp Set,
to put together this fun little box card.


I created the box card base from cardstock, using a Sizzix die.
I printed out the Marble Magic paper that looked most like water.
I die-cut that paper, and added it to the base.


I then went through the Koi Pond images and decided what I wanted to use.
I sized everything I wanted in Cricut Design Space,
and then used the print/cut feature.


Then I just had fun putting everything together.


I added the sentiment to the front flap.


Finally, I went through and added the Spectrum Noir Sparkle Marker to everything.
The glitter shows in some of the photos,
but it real life it's really sparkly and pretty! 


I also added the marbled paper to the back.
It's a pretty place to write a message.


The box card folds down to fit into an A2 envelope.


Here's one final look at the finished card:


Thanks so much for stopping in today! I'll be back soon with a new project share!

* * * * *
Here are the links for you:


Wednesday, August 21, 2019

Hugs with Rose Collage

It's kReN@afourthlife life sharing two cards today.
 I am especially fond of Bev's flower images
so I had to use the set called Bev's Rose Collage for these cards.
I combined her logo image with Retro Fun Papers for the backgrounds
for two quick and simple cards.
These are sure to cheer up the recipients I have in mind. 

Not sure how to use digital images?
Check out Bev's tutorials on YouTube, link below.


My second card added some layers and ribbon.


Check out Bev's images @

The Artsystamper Shop on Etsy
The Artsystamper Blog
 BZCole Mixed Media on YouTube


See you soon!


kReN

Tuesday, August 20, 2019

The Earth Laughs in Flowers

Hello friends!
Darlene with you today sharing another creation using beautiful digital images from
TheArtsystamperShop.  Bev has created some gorgeous designs that I'm having so much fun playing with.  This time I decided to go with a very CAS (clean and simple) design. 


By using a couple of Bev's gorgeous digital stamps & one of her sentiments, I've been able to create a quick and BEAUTIFUL card that I think anyone would love receiving!

I've created my panel by bringing her digital images into a new document in WORD10 which I've sized to a 4x6 panel.  This way I could manipulate the flowers in size and orientation as well as deepen the color on the larger aster and change the color of my butterflies to match my flowers.  I love that these images are available in both .jpg & .png format.  By using the .png file, I'm able to 'overlap' my images to create a scene as above.

This beautiful aster is included in the Aster Garden Paper pack ... do check it out!!


The sentiment & butterflies come from the beautiful Field Flower Silhouettes Nature set.


You'll certainly want to check out the TheArtsystamperShop and for inspiration,  subscribe here at the Artsystamper Blog.  The design team ladies are amazing and are showcasing some amazing works of art ... be sure to pop over and see for yourself.


Wishing you all an AMAZING day ahead! 
As always, thanks SO MUCH for taking the time to stop by! 


Sunday, August 18, 2019

Take a little time to relax...

Hello,
I am Inga Betenshi and today I would like to show you a card made with digital images by Beverly Cole.
I used  Nature of the Beach Digital Stamp Set from TheArtsystamperShop (Etsy)


It is the same shell that I scaled, flipped and printed. Then coloured with alcohol markers.

(a close up)


It is a half panel card although it is not obvious!


For more inspiration subscribe to Artsystamper Digitals Blog, be sure you visit regularly to see new projects!
Also I recommend to check out Beverly's youtube channel BZ Cole Mixed Media and Artsystamper (Facebook)

That's all for today, see you later!


Friday, August 16, 2019

Mermaid Wishes

Hi there, Aly here, Ooooh I do love the fantastical and I love mermaids, so when I got these images I was thrilled to bits. You can make a card for any occasion.

I have used Mermaid Wishes

You can see more about this card on my blog.

See you next time hugs Aly xx


Thursday, August 15, 2019

Koi Pond Stamp Set - Mega Bookmark with Kimberly Wiener


Hello there!  Kimberly Wiener here sharing another creation using  Beverly Cole's lovely images available on Etsy at TheArtsystamperShop.


Today I am featuring the 36 piece Digital Koi Pond Stamp Set.  
This set features several variations of colored and non colored koi, 
water lilies, bubbles and sentiments.


I selected a few of the waterlily images and grouped them together
 lengthwise to create a long and wide bookmark.  After I colored them with alcohol markers, I added a hole punch and a few layers of colored card stock.  

My final step you can see on my blog is where I add discarded and broken jewelry for a one of a kind sentimental bookmark tassel.


I hope that you have time to create and enjoy these 
wonderful images by Beverly Cole!


To see more about this project as well as details on the supplies used, 
please be sure to visit my blog

Please visit the Facebook Page: Artsystamper Digitals
Also visit Artsystamper on Instagram is a great place to see many inspiring projects! 

Beverly Cole has videos on YouTube  - BZCole Mixed Media with tutorials for her
 digital images as well as tips, tricks, and projects in process!

Wednesday, August 14, 2019

Nature of the beach - Mixed Media tag


Hello lovelies, hope you are well! today I am sharing my DT creation for Artsystamper
I just love Beverly's digital stamps and this wonderful Sea Turtle is one of my very favourites! I have used the 'Nature of the Beach' digital stamp set to create my mixed media art tag. 


To create my tag, I took a piece of Kraft card stock measured at 5 Inches x 3 Inches and adhered this wonderful paper from the Cherry Blossoms digital paper pack. Next, I used the Tim Holtz Curiosity definition rubber stamp along with Black soot distress ink 


Once the ink was dry, I then adhered a honeycomb die cut and torn pieces of corrugated cardboard to my tag. I then added the Sea Turtle digital stamp from the kit. Finally, I adhered an M&C Boutique foliage die cut from corrugated cardboard also. Thanks so much for stopping by, I really appreciate your lovely comments. Hugs, Zowie xx